 |
| Supplies |
After sifting through the limited and often stale and unattractive options for displaying rings, I decided to take matters into my own hands. The end result, as you can see, is actually quite fabulous and it only cost $5! Read on to find out how to make your own.
Supply List:
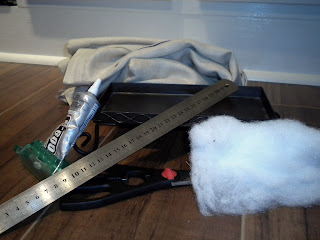
- Plater with inset (for base)
- Ruler
- Scissors
- Pen
- E600 or any other strong, slow setting glue
- Glue gun
- Fabric
- Pillow batting (I stole mine from some pillows we overfilled)
- Chopstick or dull pencil (not pictured)
I found my "plater" and fabric at Goodwill for $5. The fabric was an old pair of linen pants and the base of the display was a candle holder. Really, any item with a similar carved out middle will work. Think cigar boxes, jewelry boxes, gift boxes, etc. This is where you can really create something interesting. Just make sure the middle inset is deep enough to cover the bottom half of a ring.
How to Make Your Own Ring Display
1. Clean the inset. This will make it ready for glue.
2. Measure length and width of the inset to make the pillows. To make 4 rows for rings, I had to make 5 ring pillows. So, decide how many rows and pillows you will need. Then, divide your width by the pillows needed. Now, multiple by 2.25. This will give you the needed material width to create a stuffed pillow.
For example...
For a 5 inch wide plater with 5 pillows, I'd need material 2.25" wide. (5/5*2.25= 2.25)
3. Cut material using your measured length and calculated width. Be sure to add a little to the length so that you can tuck the ends under to make things look clean.
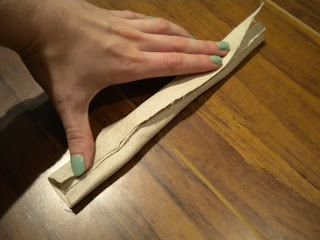
4. Fold the long ends over each other and glue with glue gun. The easiest way to do this is glue in sections with little dots of glue. Glue the top. Then move down a 1/2 inch and glue the next section. Pulling the material taught and keeping it together in a tube, as pictured, will keep folds from forming. (Do not glue the tube ends closed. You want an open tube at top and bottom.)
5. Using a chopstick or any other thin, blunt object, work the batting into the tube. Be sure to pack it in, as this will make your rows really grip the ring in place.
 |
| Stuffing Pillow |
|
|
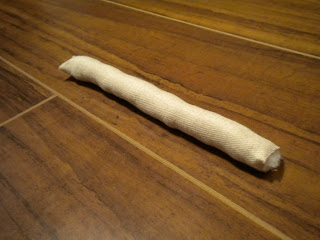 |
| Finished Pillow |
6. Arrange ring pillows in the inset area to get a feel of where everything should go. If a pillow isn't sitting right, add more batting at the end or work out lumps. As you can see, some lumps are OK, so don't make yourself crazy.
 |
| Pre-Glue Positioning |
7. Remove pillows and glue with E600 or the like. I DO NOT recommend a glue gun since it dries too quickly. You will need something slower drying since you'll need time to work the pillows tightly in place.
8. Tuck in any stray ends to make the finished product look finished.
9. Done! Now you can display your rings in your own custom ring displayer!
Note: If you're using a light colored fabric like me, I'd spray it with Scotch Guard to make it less likely to stain.
Enjoy!
<3 Andrea
P.S. If you like this post, be sure to
subscribe to my blog to get instant updates on more good stuff!