Showing posts with label DIY. Show all posts

Friday, October 21, 2011

Knitted Bracelet Tutorial

Hello! Sorry for my absence. I'm in the midst of planning my wedding and it's quickly approaching-- Nov 11th baby! So my time has been maxed out between the shop, working, and training for my winter triathlon.

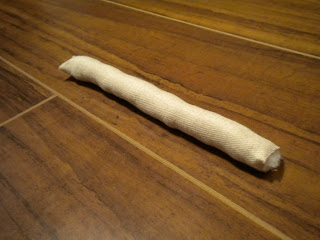
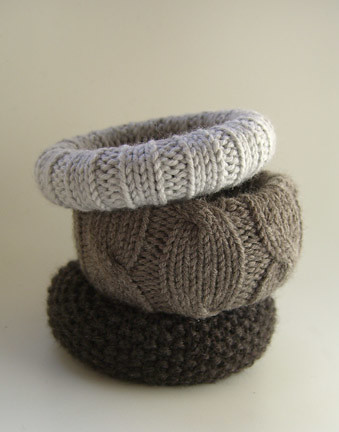
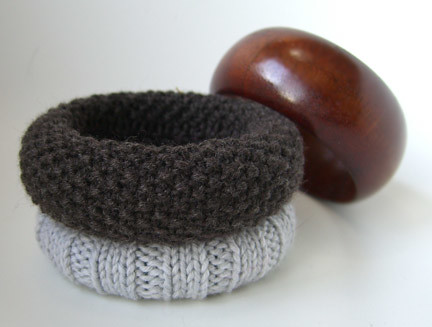
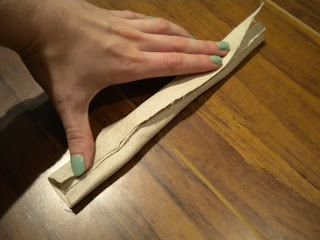
Anywho, I thought I'd post this knitting idea seen on Ravelry.com. Although the creator knitted around the bangle, I bet you could just as easily cut a measured strip from an old sweater and sew it together on the inside of the bangle. May need to try this. Whatdoya think?

braceletsfinished

bracelets


Want more? Subscribe! It's free, after all. And we all like free.

Friday, August 12, 2011

Cool & Easy DIY Jewelry Display Idea

So, I stumbled onto these images rummaging around Google Images recently and had to share! Using old books and magazines to dsplay things isn't new, but paint rollers? Now that's interesting! Click the picture to see more images!

fall-jewelry-display-ideas-diy
Fall Jewelry Display from Banana Republic

Wednesday, June 22, 2011

Super Sweet Headboard Tutorial By Simply Sjostedt

Always with the personal touches, Heather over at Simply Sjostedt has this awesome headboard tutorial up. It's great and looks fab--all from a simple tool. Stencils! Check it out!


Wednesday, June 8, 2011

Finally! A Way to Patina Charms That Is Dum(ME)proof!

I've been experimenting lately with adding a patina to some of my charms. I've tested the salt/vinegar technique but I'm doing something wrong. Most likely it's me, but I also want something that can work on any metal, not just raw brass.

Then, EUREKA! Ornamentea comes through! Check out her easy tutorial on adding a patina with paint. And want to know the best part? You don't have to stick to the traditional patina with this! Pink, purple, orange, blue... if there's a spray paint, there's a away! Thank you Ornamentea!!!


Like this? Want more? Subscribe! It's free, after all. And we all like free.

Tuesday, April 19, 2011

Read and Submit Free Tutorials with Totally Tutorials

Love tutorials? So do I. So you'll also love this great blog that EviesToolEmporium on Etsy introduced me to. It's called Totally Tutorials and it's a totally free resouce to access and submit your own tutorials. What a great idea!


Here's are some of my recent favorites...

How to Make a Yoga Mat Bag

How to Make Solid Perfume

How to Make a Stamped Metal Monogram Pendant

<3
Andrea

Saturday, April 16, 2011

Make Your Own Ring Display- Cheap and Easy!

How To Make Your Own Ring Display DIY
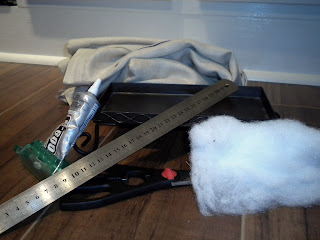
Supplies
After sifting through the limited and often stale and unattractive options for displaying rings, I decided to take matters into my own hands. The end result, as you can see, is actually quite fabulous and it only cost $5! Read on to find out how to make your own.

Supply List:
  • Plater with inset (for base)
  • Ruler
  • Scissors
  • Pen
  • E600 or any other strong, slow setting glue
  • Glue gun
  • Fabric
  • Pillow batting (I stole mine from some pillows we overfilled)
  • Chopstick or dull pencil (not pictured)

I found my "plater" and fabric at Goodwill for $5. The fabric was an old pair of linen pants and the base of the display was a candle holder.  Really, any item with a similar carved out middle will work. Think cigar boxes, jewelry boxes, gift boxes, etc. This is where you can really create something interesting. Just make sure the middle inset is deep enough to cover the bottom half of a ring.

How to Make Your Own Ring Display


1. Clean the inset. This will make it ready for glue.

2. Measure length and width of the inset to make the pillows. To make 4 rows for rings, I had to make 5 ring pillows. So, decide how many rows and pillows you will need. Then, divide your width by the pillows needed. Now, multiple by 2.25. This will give you the needed material width to create a stuffed pillow.

For example...
For a 5 inch wide plater with 5 pillows, I'd need material 2.25" wide. (5/5*2.25= 2.25)

3. Cut material using your measured length and calculated width. Be sure to add a little to the length so that you can tuck the ends under to make things look clean.

4. Fold the long ends over each other and glue with glue gun. The easiest way to do this is glue in sections with little dots of glue. Glue the top. Then move down a 1/2 inch and glue the next section. Pulling the material taught and keeping it together in a tube, as pictured, will keep folds from forming. (Do not glue the tube ends closed. You want an open tube at top and bottom.)

How To Make Your Own Ring Display DIY

5. Using a chopstick or any other thin, blunt object, work the batting into the tube. Be sure to pack it in, as this will make your rows really grip the ring in place.

How To Make Your Own Ring Display DIY
Stuffing Pillow

How To Make Your Own Ring Display DIY
Finished Pillow

6. Arrange ring pillows in the inset area to get a feel of where everything should go. If a pillow isn't sitting right, add more batting at the end or work out lumps. As you can see, some lumps are OK, so don't make yourself crazy.

How To Make Your Own Ring Display DIY
Pre-Glue Positioning

7. Remove pillows and glue with E600 or the like. I DO NOT recommend a glue gun since it dries too quickly. You will need something slower drying since you'll need time to work the pillows tightly in place.

How To Make Your Own Ring Display DIY

8. Tuck in any stray ends to make the finished product look finished.

9. Done! Now you can display your rings in your own custom ring displayer!

How To Make Your Own Ring Display DIY


Note: If you're using a light colored fabric like me, I'd spray it with Scotch Guard to make it less likely to stain.

Enjoy!
<3 Andrea

P.S. If you like this post, be sure to subscribe to my blog to get instant updates on more good stuff!

Wednesday, January 12, 2011

Make Your Own Earring Storage and Organizer for Cheap! DIY

Ah, earrings. Out of all my jewelry, I love you the most. BUT, organizing, storing, and/or displaying them had always been a problem UNTIL I created this cool earring frame. And the best part... this won't cost you more than $3! Read on to find out how to organize and store your earrings with style and for cheap!

ITEMS NEEDED:
  • Frame
  • Glue Gun
  • Pencil
  • Tulle, 1 yard
  • Ribbon, 1/2 yard (Optional)

For the frame and glue gun, I hit up my local dollar store. Be creative and choose a decorative frame in a color. The possibilities are endless!
Items You Will Need

ShareThis

Related Posts Plugin for WordPress, Blogger...